Email Ticketing
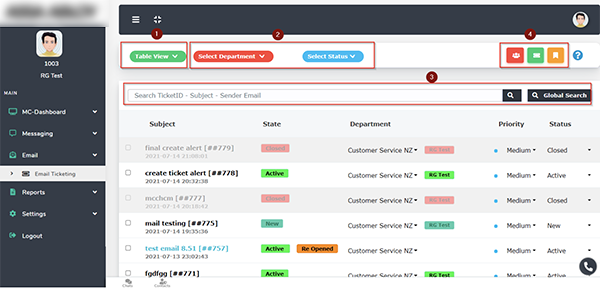
- Changing view (Table display)
- Filter criteria (Department, Status)
- Search (Local, Global)
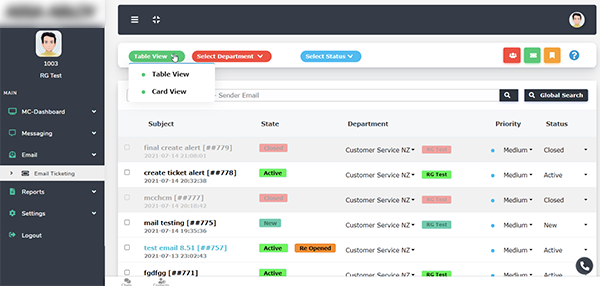
Email Ticketing – Change View
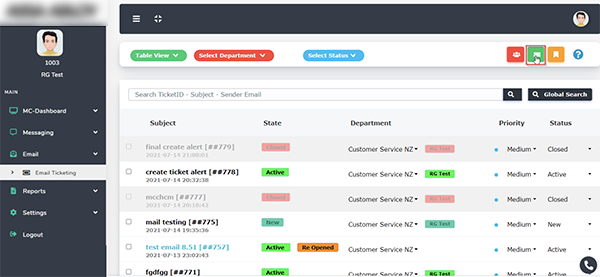
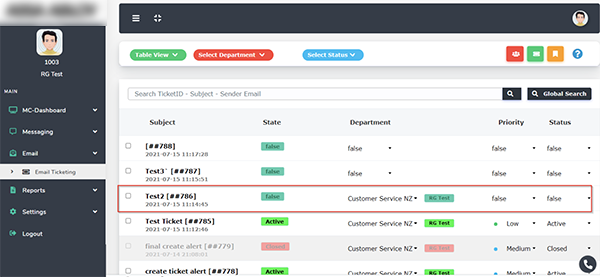
There are 2 view types: Table and Card.
Table View
Card View
The card view allows you to change some fields without going into the details of the ticket. You can change: Department, Priority, and Status.
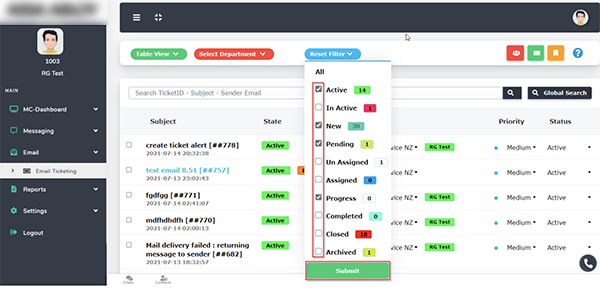
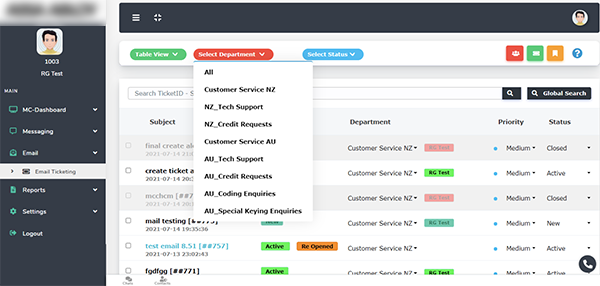
Email Ticketing – Filtering (Department, Status)
You can filter by Department or Status.
Department Filtering
The department filter allows you to select one department at a time. From the drop-down select the department to be filtered.
Status Filtering
Status filtering allows for multiple selections.
- Click on the Status filter for the drop down menu.
- Click the checkbox for selection.
- Click Submit to confirm the selection.
Reset Filter

When no filter is applied, you will see the filter buttons displayed as “Select Department” and “Select Status”.
Drop the filter and select “All” to reset the filters.
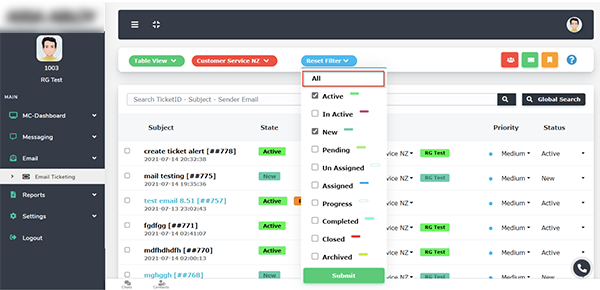
Drop the filter and select “All” for the reset of Status filter.
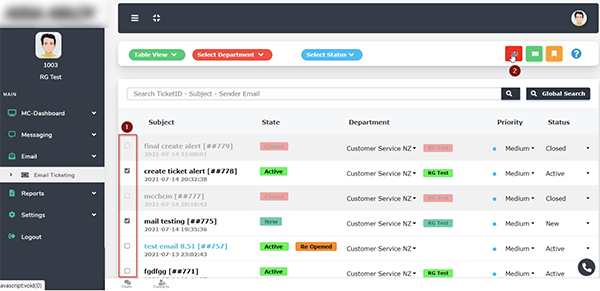
Email Ticketing – Assign Ticket (Single or Bulk)
- Click the checkbox to select ticket. (Multiple selection is permitted)
- Click on the assign button.

- A pop-up will appear from which you must choose the department to assign to.
Completed, Closed and Archived tickets cannot be assigned.
Email Ticketing – Create Ticket
Any request via another communication channel, can be created as a ticket in the system.

- Department the ticket is being assigned to – Mandatory
- Status of the ticket. (Active, Pending, etc) – Mandatory
- Email used to send to the recipients (Source of the email) – Mandatory
- Agent to be assigned.
- Priority status. (Urgent, Medium, etc) – Mandatory
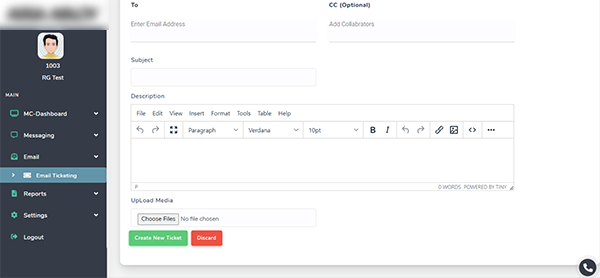
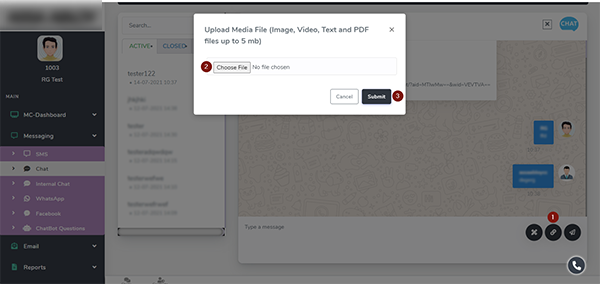
The ticket request (Description and details) can be drafted in here. You can attach files by clicking the “Choose Files” button. Once completed, click “Create New Ticket”.
Click on Email Ticketing, and the ticket can be found in the queue.
If you receive a bounce mail in the email ticketing queue, resend the email.
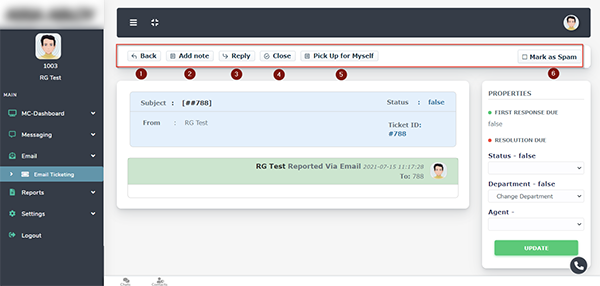
Email Ticketing – Update Ticket
- Back: Return to Email Ticketing Page.
- Add note: Add a comment to the ticket, for internal view (Private note).
- Reply: Answer the ticket. An email will be triggered and sent to the recipient.
- Close: Closes the ticket (issue resolved or duplication). When a ticket is closed the other party receives an email notification.
- Pickup for Myself: This option is available when the ticket is not assigned to any other agent.
- Mark as Spam: If this email is not for the purpose of support (Advertisement, etc). Emails marked as spam will be blocked from the system and this cannot be reverted.
Add Private Note
The note is displayed as a private note beneath the message thread.
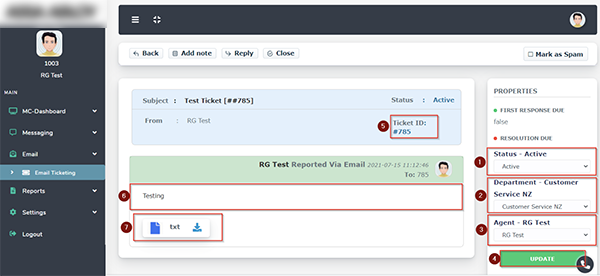
Update Ticket – Others
Click on a ticket to open it. Within the ticket you will find the following options and information:
- Status: Change status or close ticket.
- Department: Assign the ticket to another department.
- Agent: Re-assign to another agent (ensure the correct department is selected).
- Update: Confirm the changes.
- Ticket ID
- Description of the issue/ case
- Download attachment (If any)
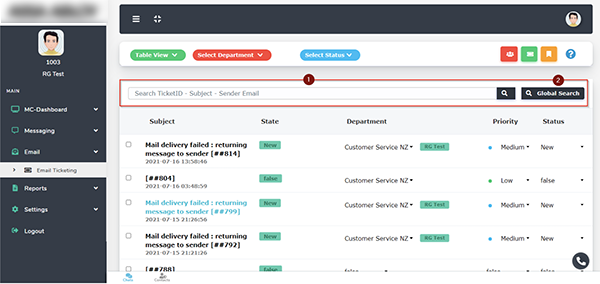
Email Ticketing – Search
- The search button allows you to search for a ticket within your department or unassigned open tickets.
- Global search will search the entire email ticketing database and provide cross-department results.
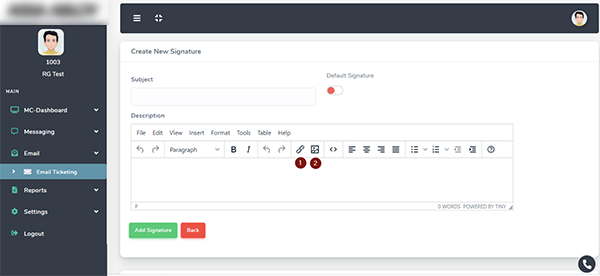
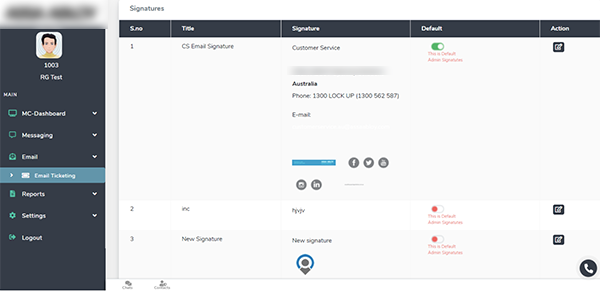
Email Ticketing – Signature
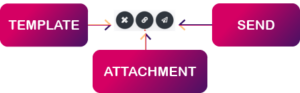
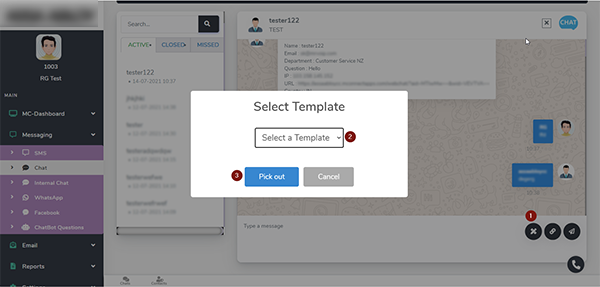
Creating or updating a signature is done by clicking on this icon  on the top right corner of the email ticketing page.
Adding Signature
Enter the signature information and click “Add Signature”. It will save the signature as a template.
- Add a link to the signature.
- Add an image to the signature.
Change default Signature
Method 1: Click  during the signature creation.
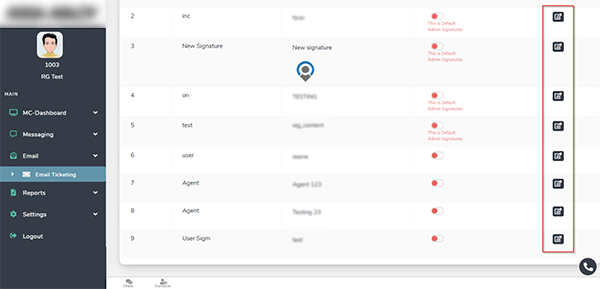
Method 2: Scroll down to see all signatures, select and click.
Edit Signature Template
- Click on the edit button on the right of the signature.
- Update the signature’s content.
- Click “Update Signature”.
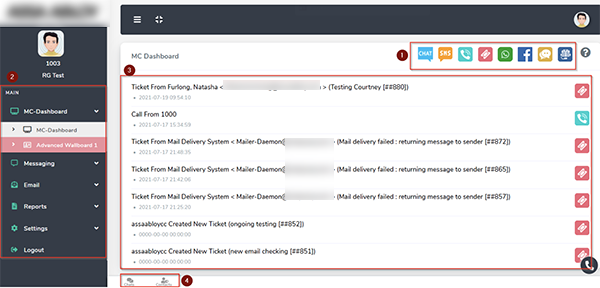
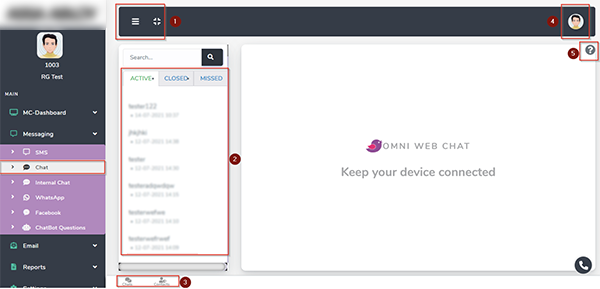
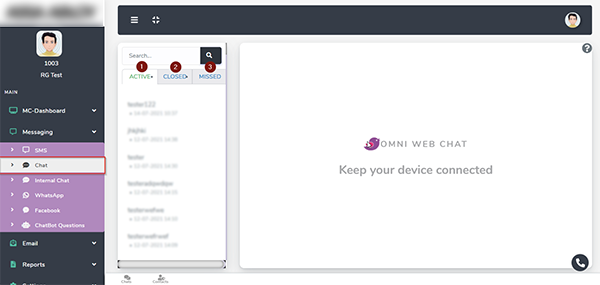
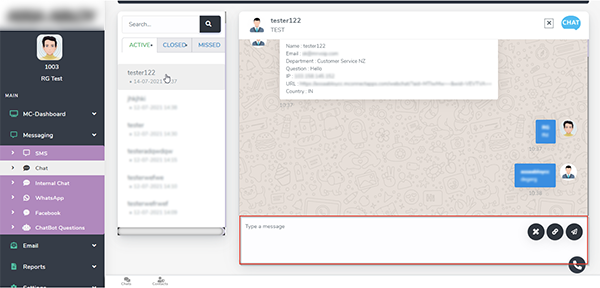
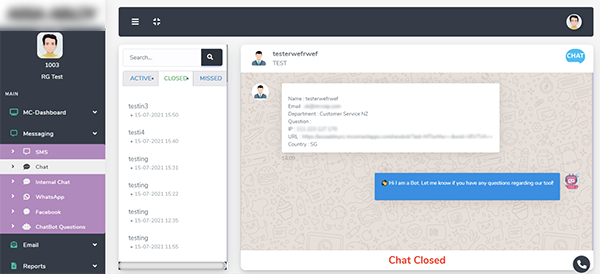
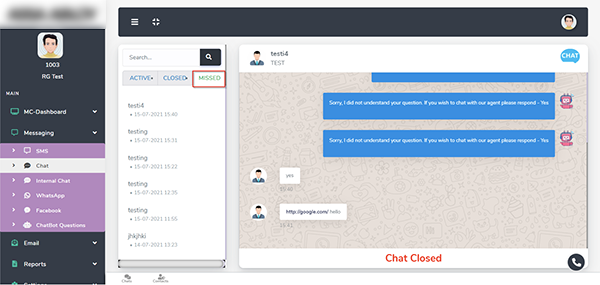
 Messaging > Chat
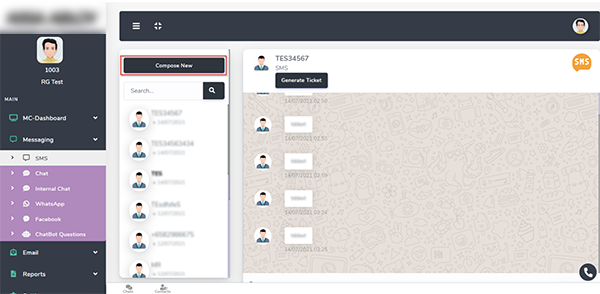
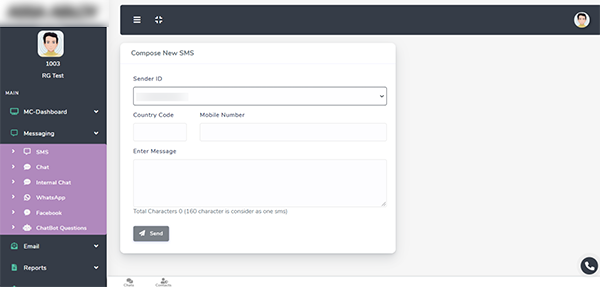
 Messaging > SMS
 Call > Recent
 Messaging > Facebook
 Messaging > Internal Chat
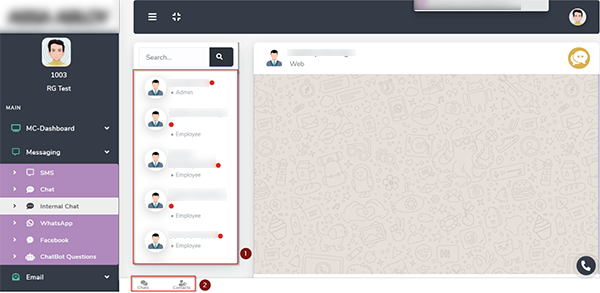
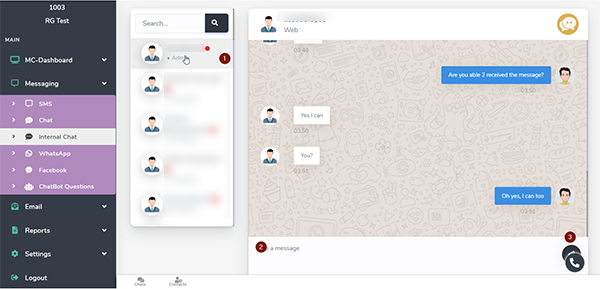
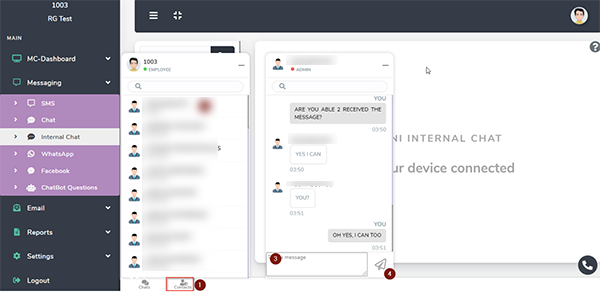
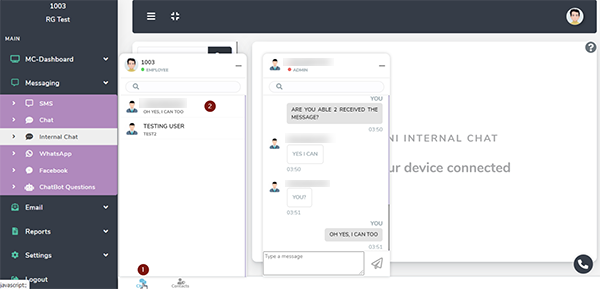